Here is some easy steps to create a Logo.
Step 1
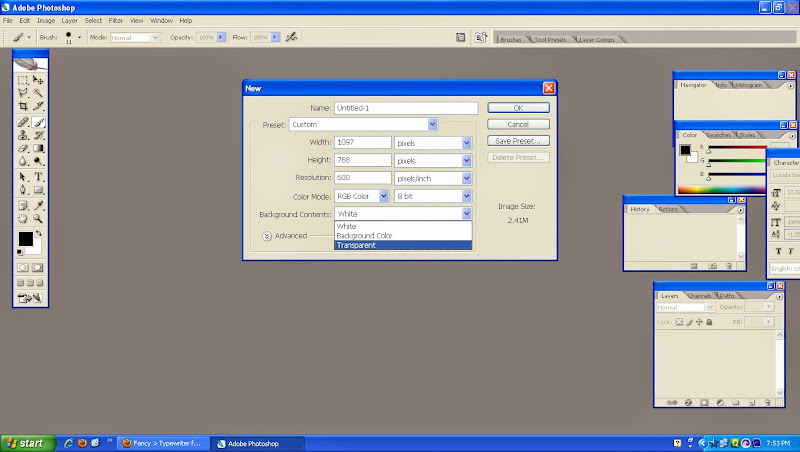
create a new page in ‘Transparent’ and 300/600 dpi mode
Step 2
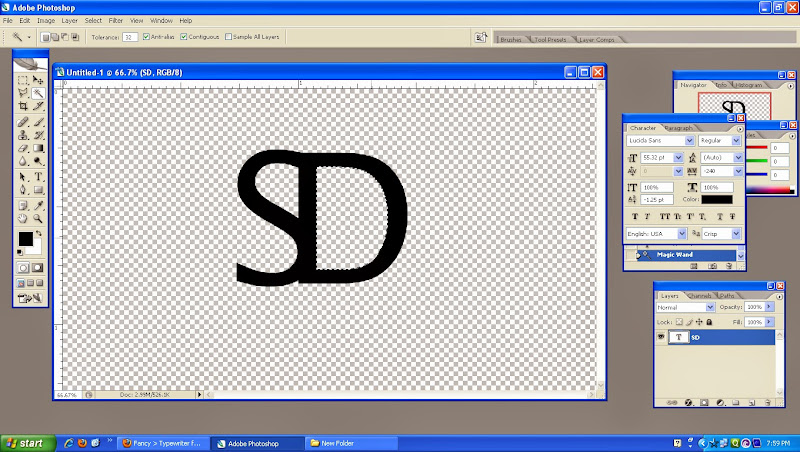
Type any 2/3 letters and then select ‘character’ (in right side) to arrange the selected letters, and then use ‘Magic Wand tool’ (in left side box) in that letter which has box types…eg. B. D, Q, O, P etc…
Step 3
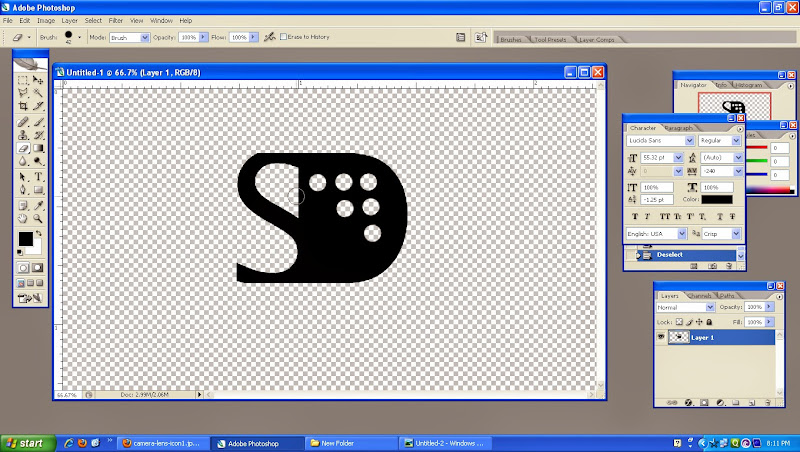
after filling the color into ‘D’ by ‘Magic Wand Tool’, then as additional use ‘rubber tool’ to create some HOLES on ‘D’
(you can create any kind of shape)
Step 4
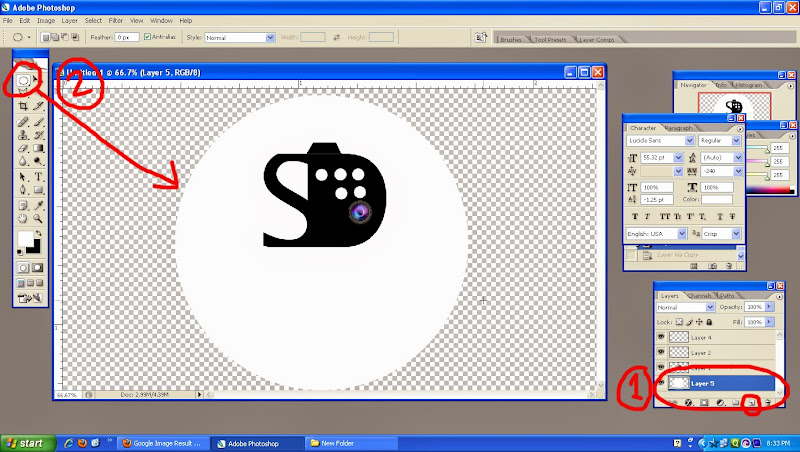
Create a layer and then
select ‘rectangular marquee tool’ OR ‘elliptical marquee tool’ or nothing (choice is yours)!
check, where the layer is situated…
Step 5
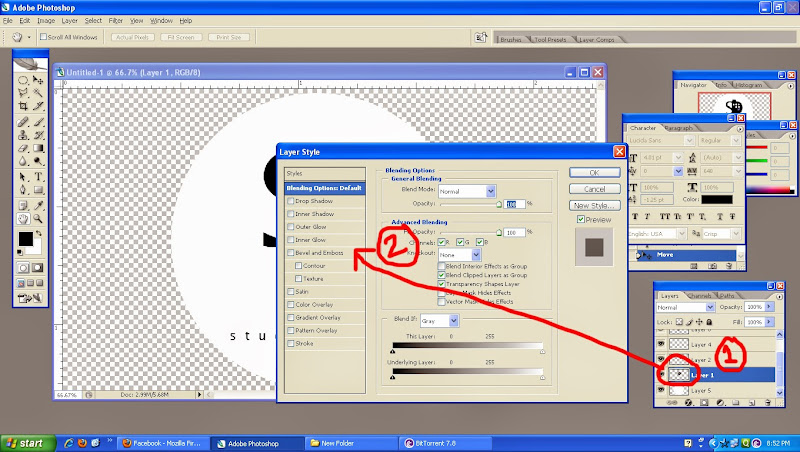
DOUBLE click on the 1.’circled area’ and then 2. ‘bevel and emboss’ to create 3D effect…
Step 6
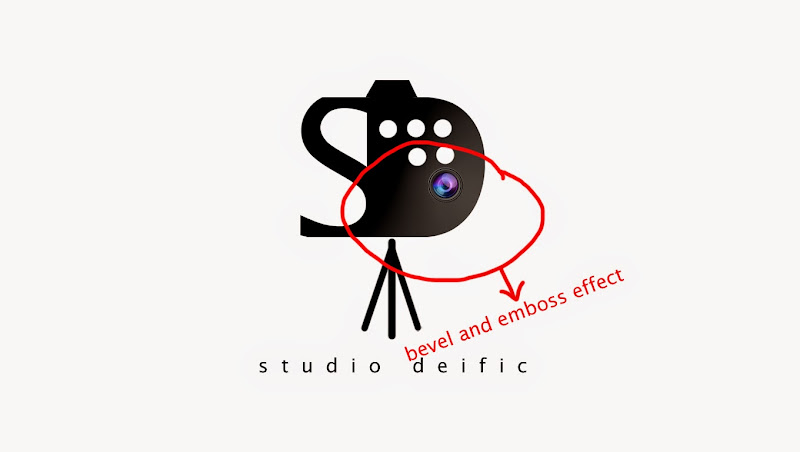
now, you can see the effect of ‘Bevel and Emboss’ and oh, then type the full name of that logo in below…(“studio deific”)
Step 7
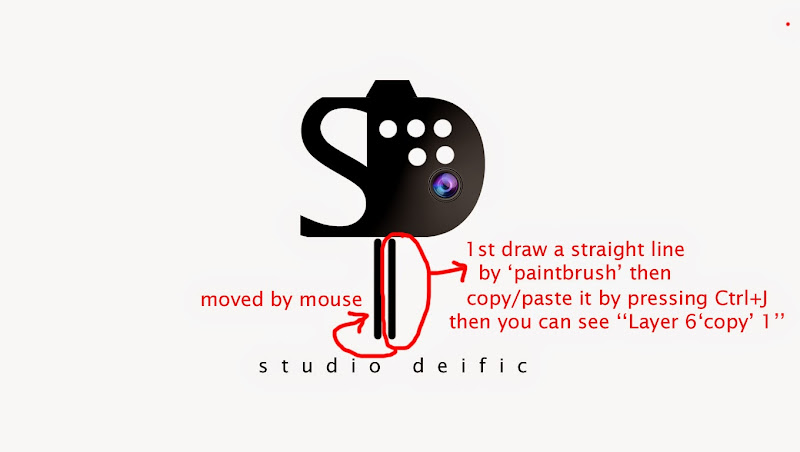
Create ‘new layer’ again, then draw a straight line, ant copied it by pressing ‘Ctrl+J’, you can see at Layer box that ‘Layer 6 copy1’and then move the pasted one by using mouse…
Step 8
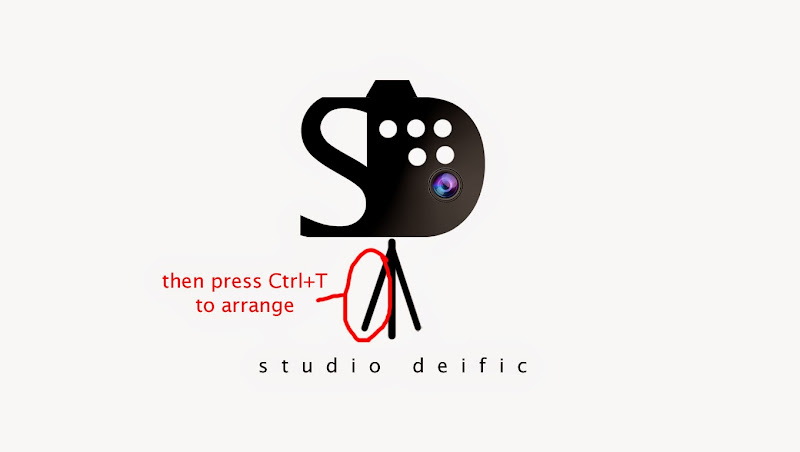
after that, copy it again by the said way, and then Press ‘Ctrl+T’ to arrange, like Curve line… (remember don’t forget to hold Alt+shift while arranging the lines)
Step 9
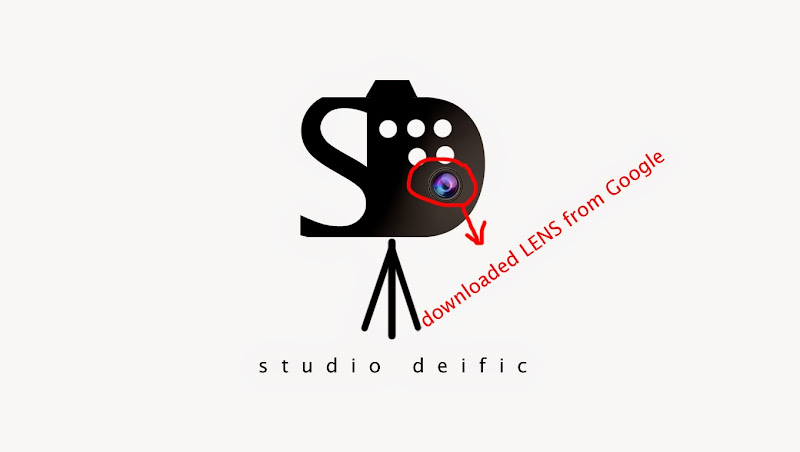
Final Product
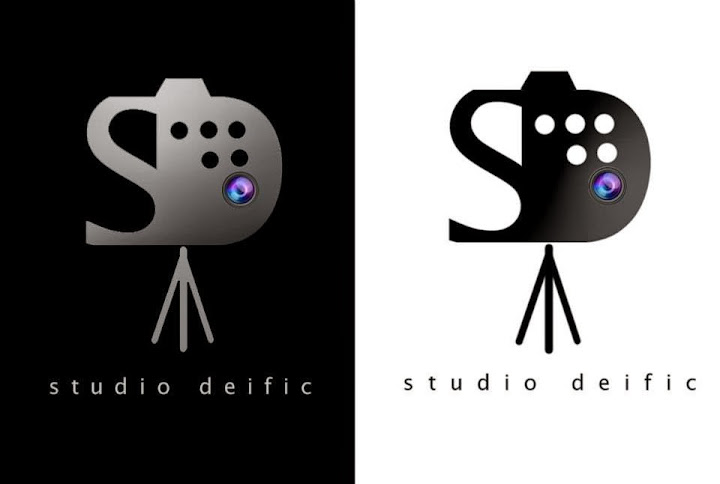
And oh, I’ve forgotten mention about the LENS, yeah, I have downloaded it from Google….!
After finishing the logo, save it as ‘PNG’ mode…
Why ‘PNG’ Mode?
Because, it is a logo, whenever you put this logo (as a copyright) on your photography, painting etcetera through Photoshop/illustrator, then it will be very easier to place that logo into your picture as it support transparency.


